

What Size Document Should I Start To Make A Logo In Photoshop
How to make a logo in Photoshop

Before starting with how to make a logo in Photoshop, we should accost the elephant in the room – Photoshop CC was not built with logo design in mind. One of the cardinal qualities of a logo is being able to scale upward and down without any loss of quality. This is why vector-based software, such every bit Illustrator, is the preferred option for creating logos, where Photoshop'southward pixel base is less suitable. For more than information on designing a logo using Illustrator, check out this handy guide, which will accept yous through the process, from concept to completion.
Just what Photoshop lacks in application, it more than than makes up for in popularity, especially when compared to Illustrator CC. So if y'all demand to know how to make a standout logo, just don't desire to pay for software yous don't need, this tutorial is for you. Nosotros'll walk you through how to design a basic logo in Photoshop, using simple shape tools, gradients and text options. Explore these options and you'll be making your own logos in Photoshop in no time. We're using Photoshop CS6, but the same process applies to other versions.
- Go Adobe Artistic Cloud now
When it comes to actually designing your ain logo, you lot may demand to start thinking about brand identity and way. For more than inspiration, head to our pro guide to how to pattern a logo, which tells yous everything y'all need to know well-nigh the world of logos.
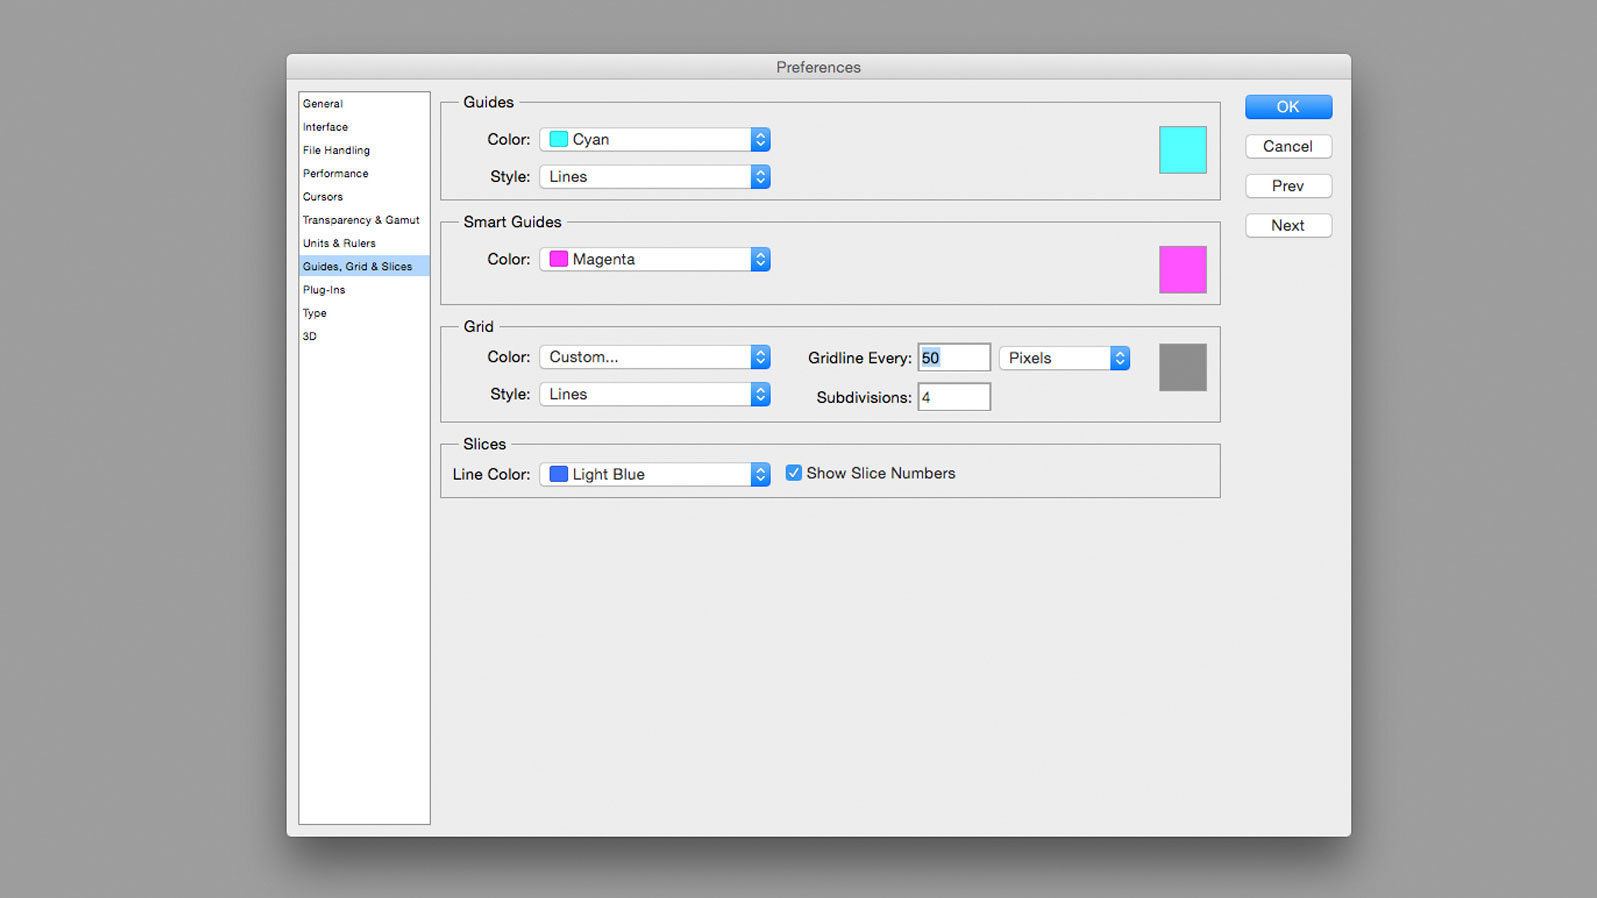
01. Create a new canvas
(Epitome: © Matt Smith)
Open Photoshop and create a new document. I used a canvas size of 500px 10 500px, but larger sizes would work just as well. You can alter the canvas size at any point. Become into Photoshop > Preferences to set up a gridline every 50px. Then turn the grids on, in the canvass, by pressing cmd + ' or View > Show in the Options bar. Make sure Snap to Grid is turned on, under View > Snap to.
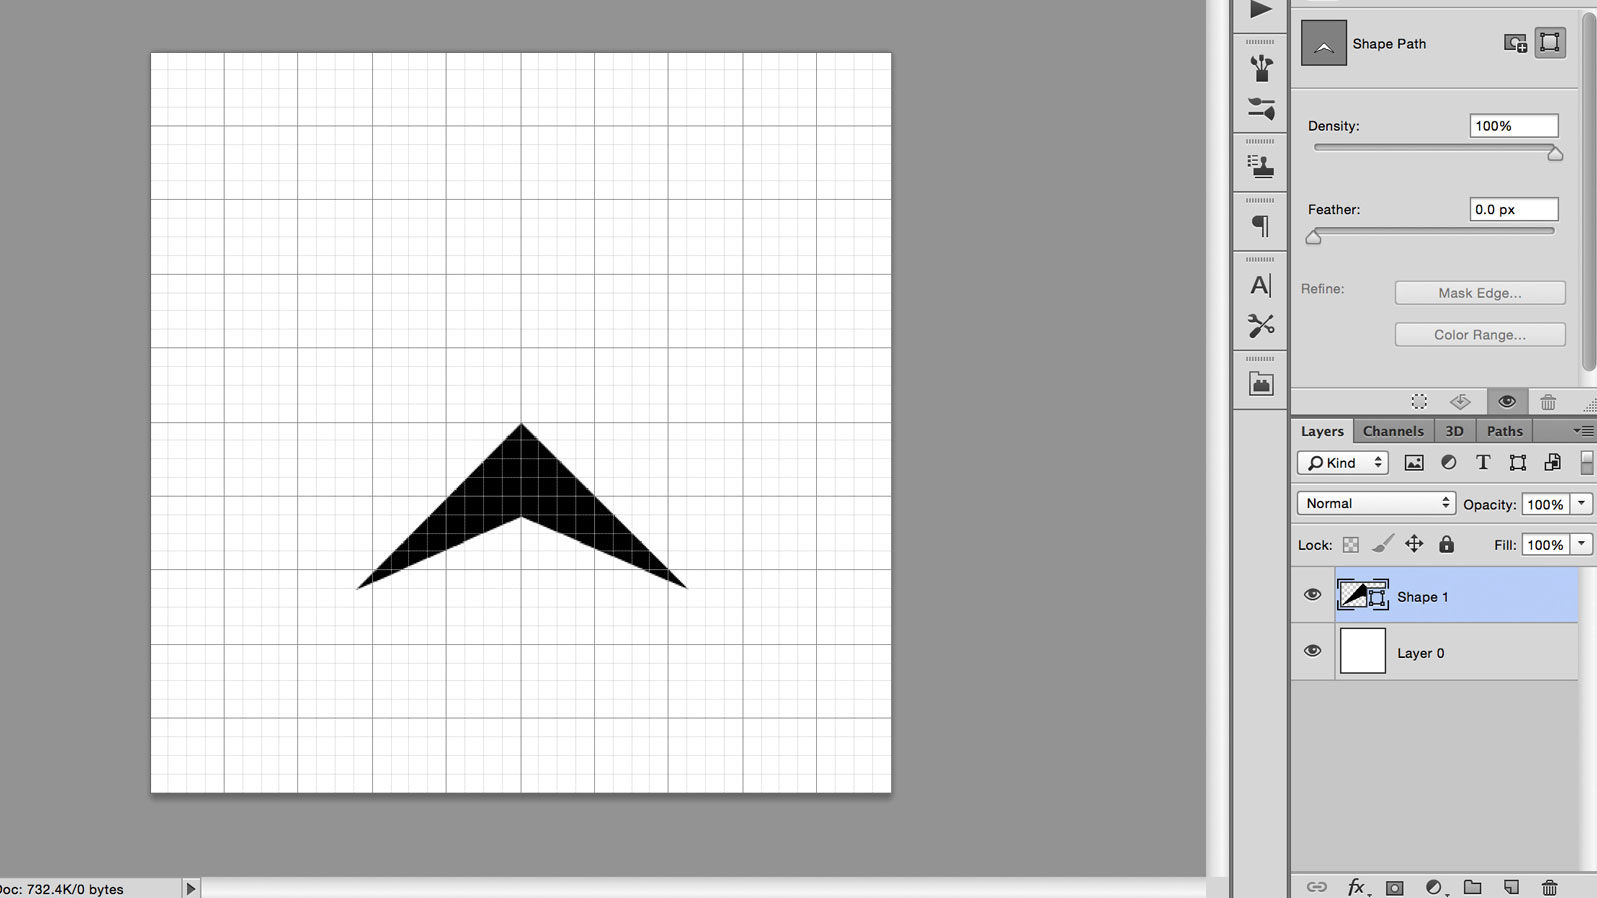
02. Describe a basic shape
(Prototype: © Matt Smith)
Select the Pen tool in the toolbar, or by pressing P, and make sure it'southward gear up to Shape in the left of the Options bar, rather than Path. Use the pen to depict an arrowhead shape, starting at the center-signal of the canvas and using grid-line intersections for your other points. Naming the layers is not necessary for this projection, but it can exist helpful in more than complicated documents, where in that location are many layers.
03. Indistinguishable and edit the shape
Duplicate the layer, by pressing cmd + J and click on the new layer to select it. Utilize the Direct Selection tool, shortcut A, to click on the top-most point of the arrowhead, located at the centre of the canvas. Movement this point down a few grid squares, holding the Shift cardinal to keep it locked on the y-centrality.
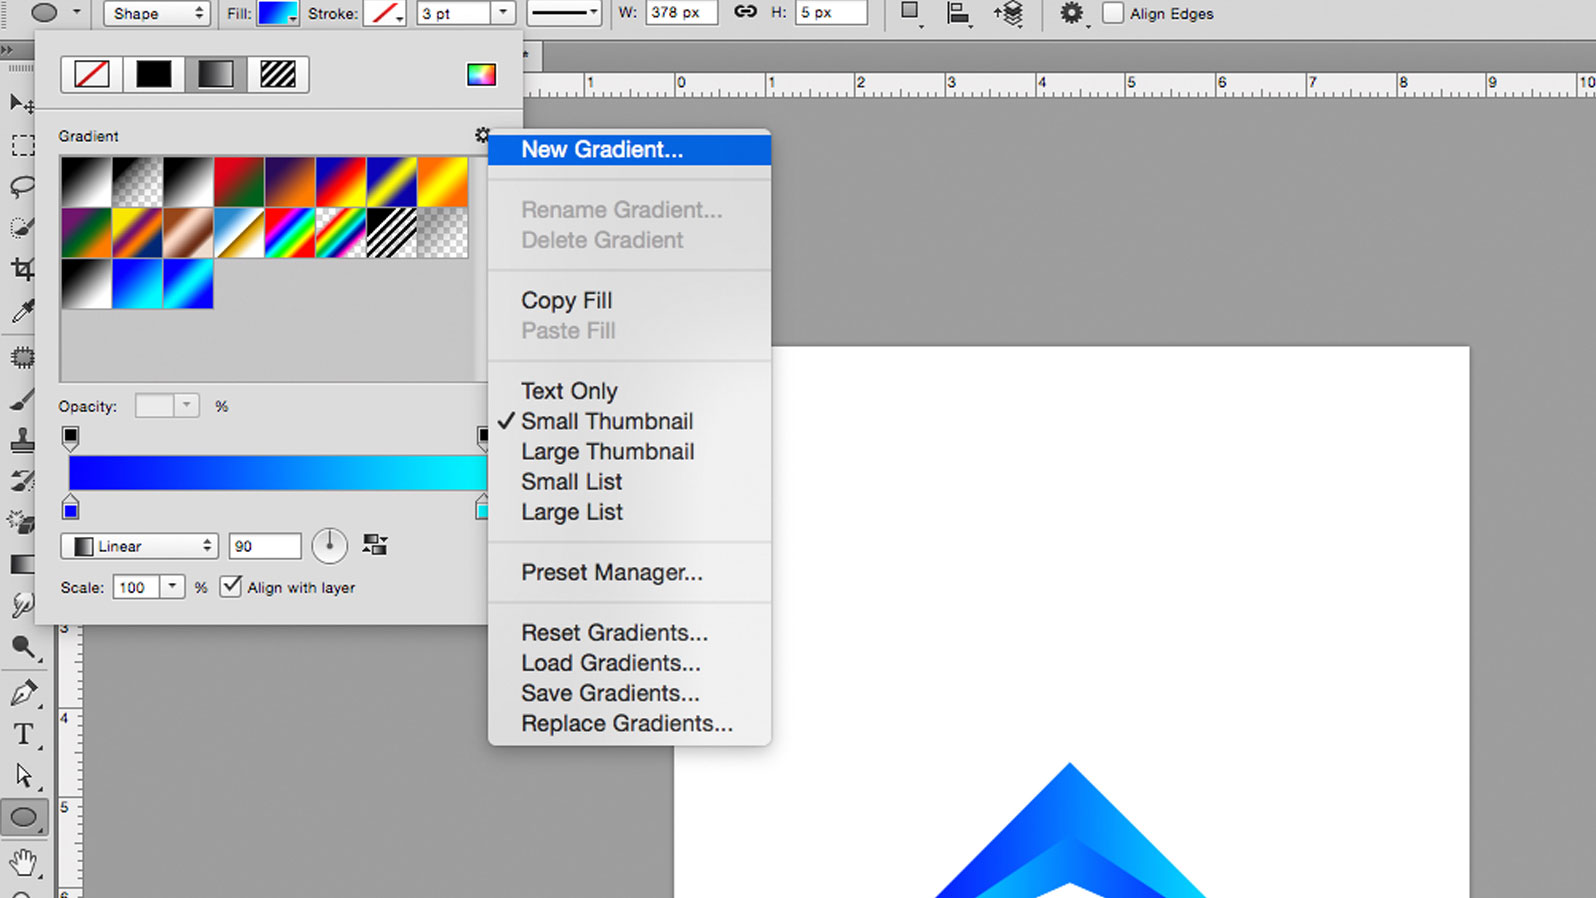
04. Add color with a gradient
(Image: © Matt Smith)
Create a new slope in the Fill drop-downwardly menu, to the left of the Options bar. In the gradient window, double click on the bottom sliders to bring upward RGB options, where you can cull your colours; I went for a low-cal and dark blue. Then utilise this gradient to both objects, changing the slope rotation so they oppose each other. If you lot can't run into the Fill options, information technology may be because you may have the Move tool selected, and then switch to the Pen or Shape tool.
05. Group and duplicate your layers
(Paradigm: © Matt Smith)
Grouping the two layers by selecting them and pressing the group button, which looks similar a little folder, located at the bottom of the Layers tab. This prevents the Layers tab from becoming messy and makes it easier to handle the 2 layers together.
Duplicate this group and use the Costless Transform function to rotate the new group ninety-degrees, holding downwardly the Shift cardinal to rotate in fifteen-caste increments. You can admission Free Transform using cmd + T or under Edit > Complimentary Transform. Now motion the 2nd group up, until it reflects the original shape, using the centre of the sail as a line of symmetry.
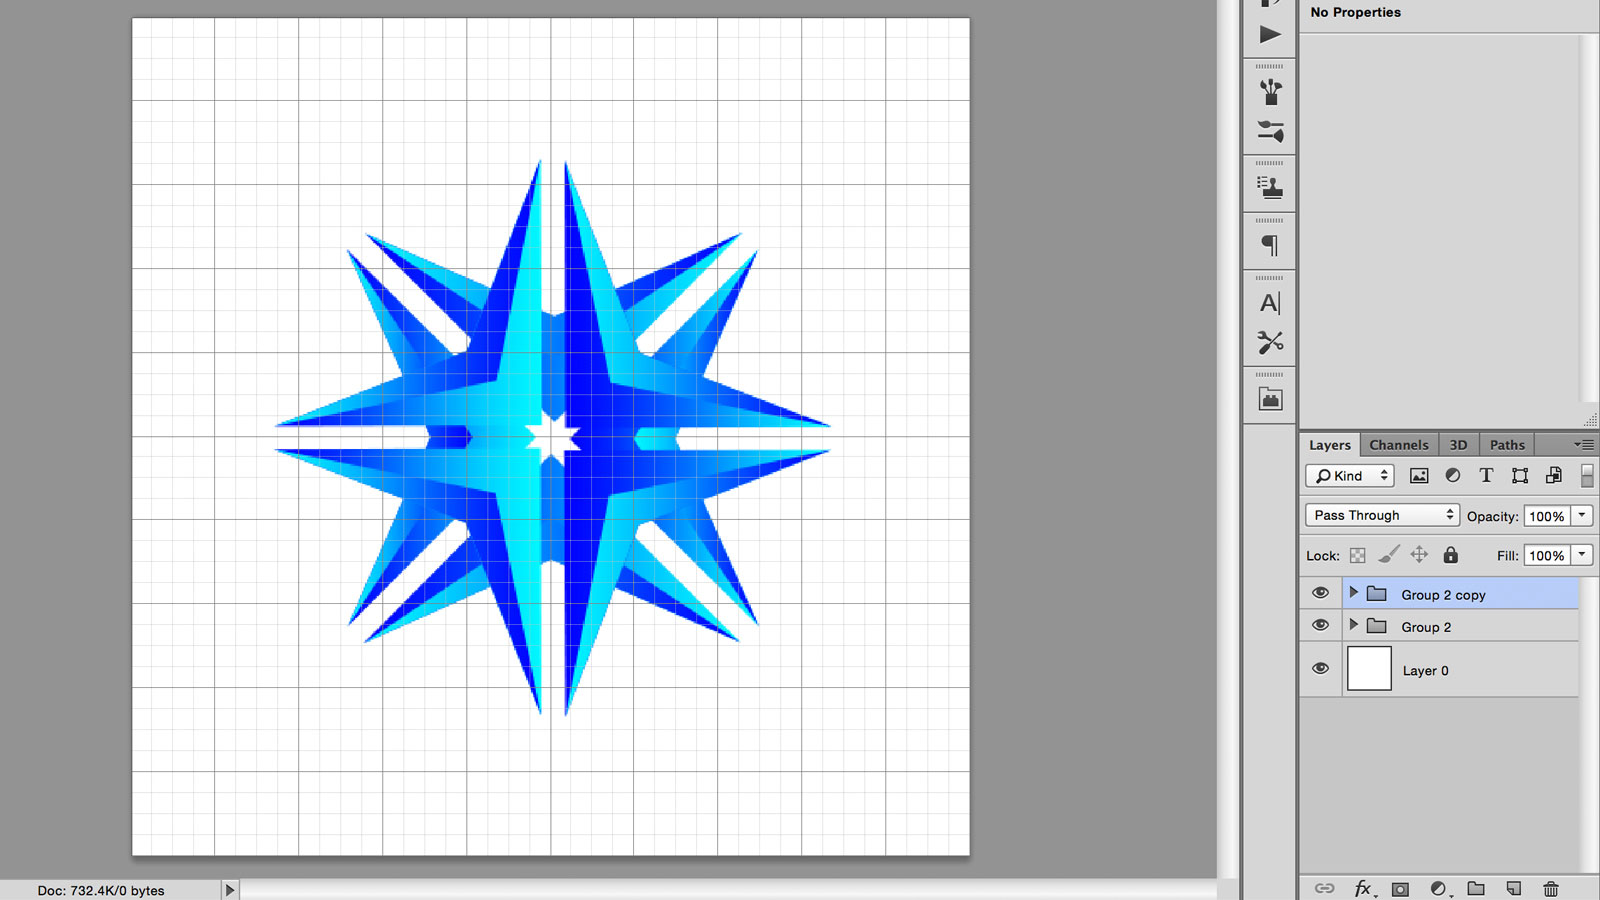
06. Transform the shapes
(Image: © Matt Smith)
Nudge each shape up or down ane filigree foursquare, away from the centre betoken, using Shift + cursor key.
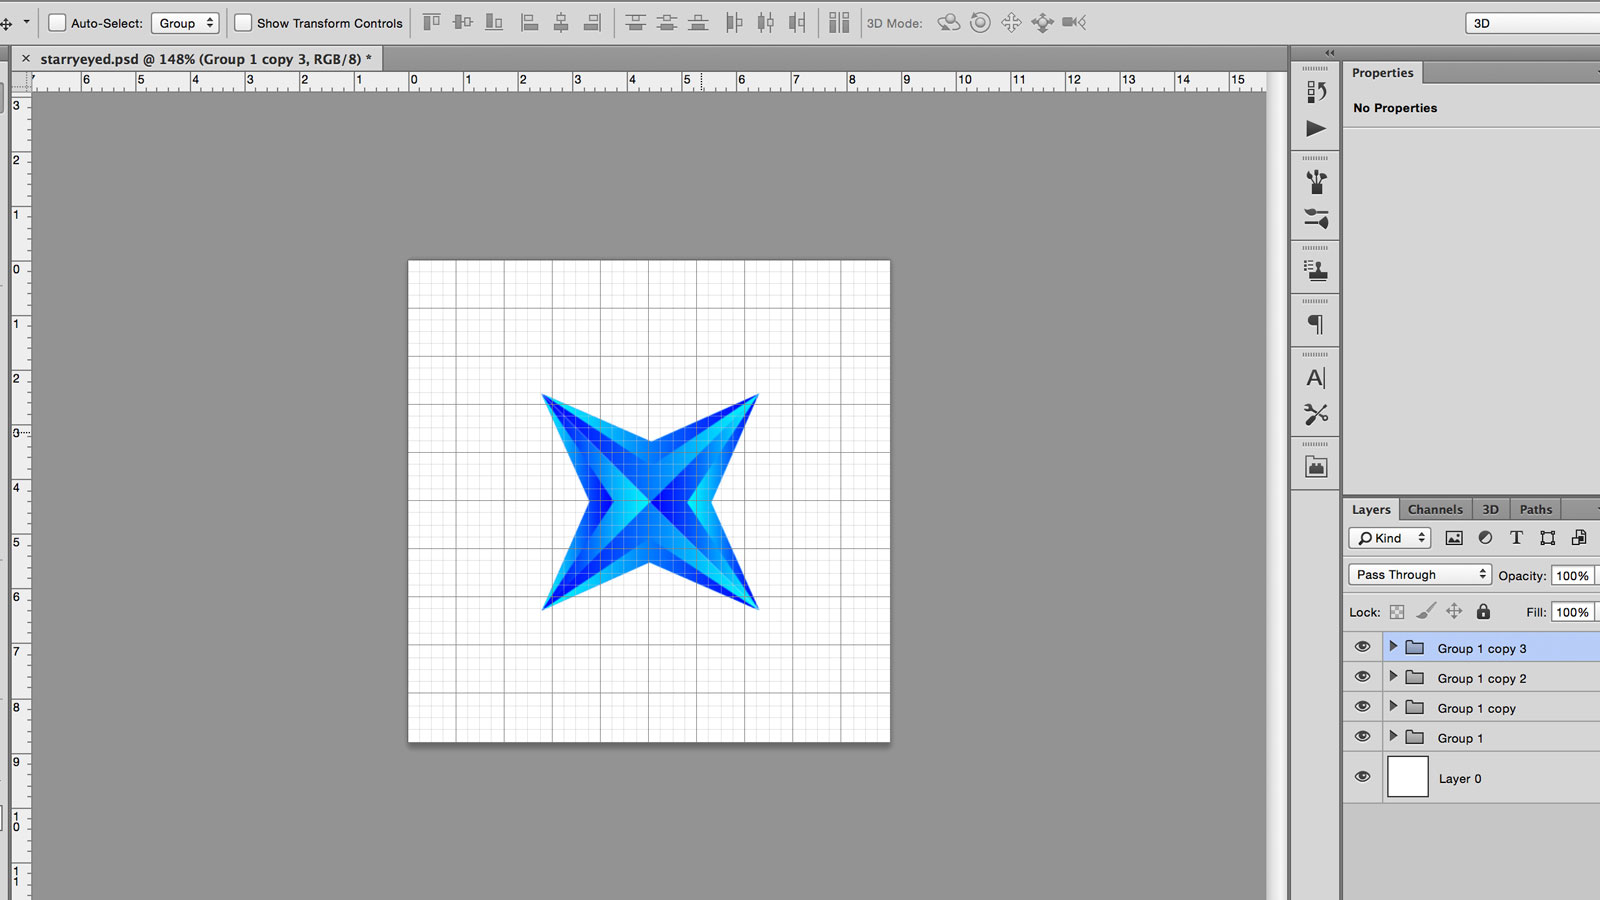
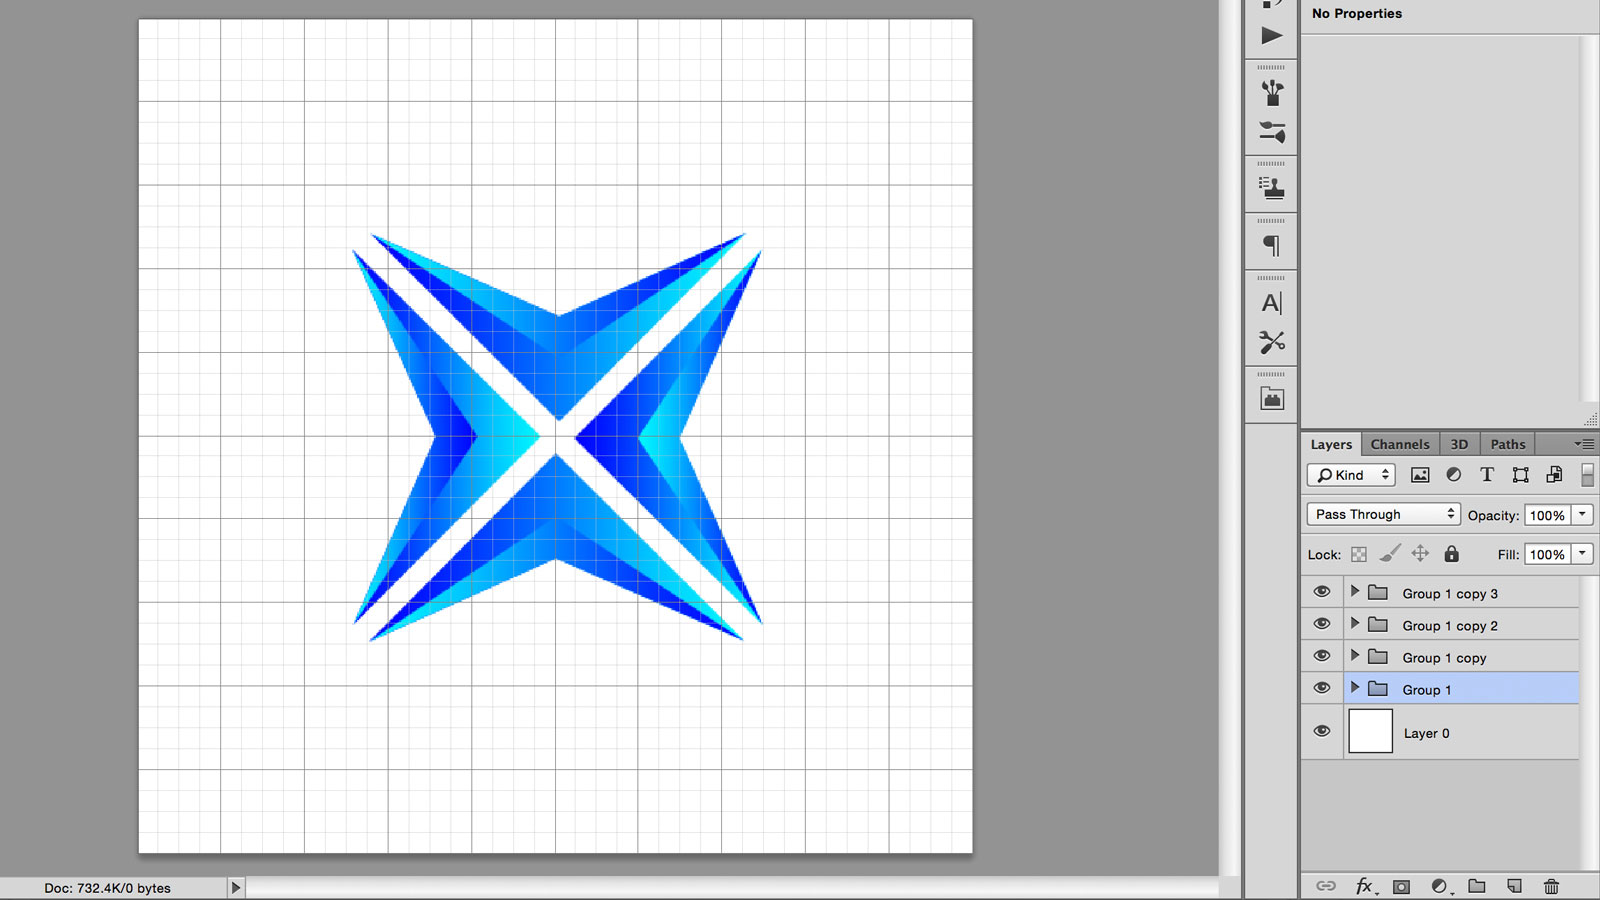
07. Group, duplicate, repeat
(Epitome: © Matt Smith)
Using the same method from pace #five to grouping the layers together, duplicate the group and rotate by ninety-degrees. The new shape should resemble a sort of crosshair shape.
08. Draw a circle with the shape tool
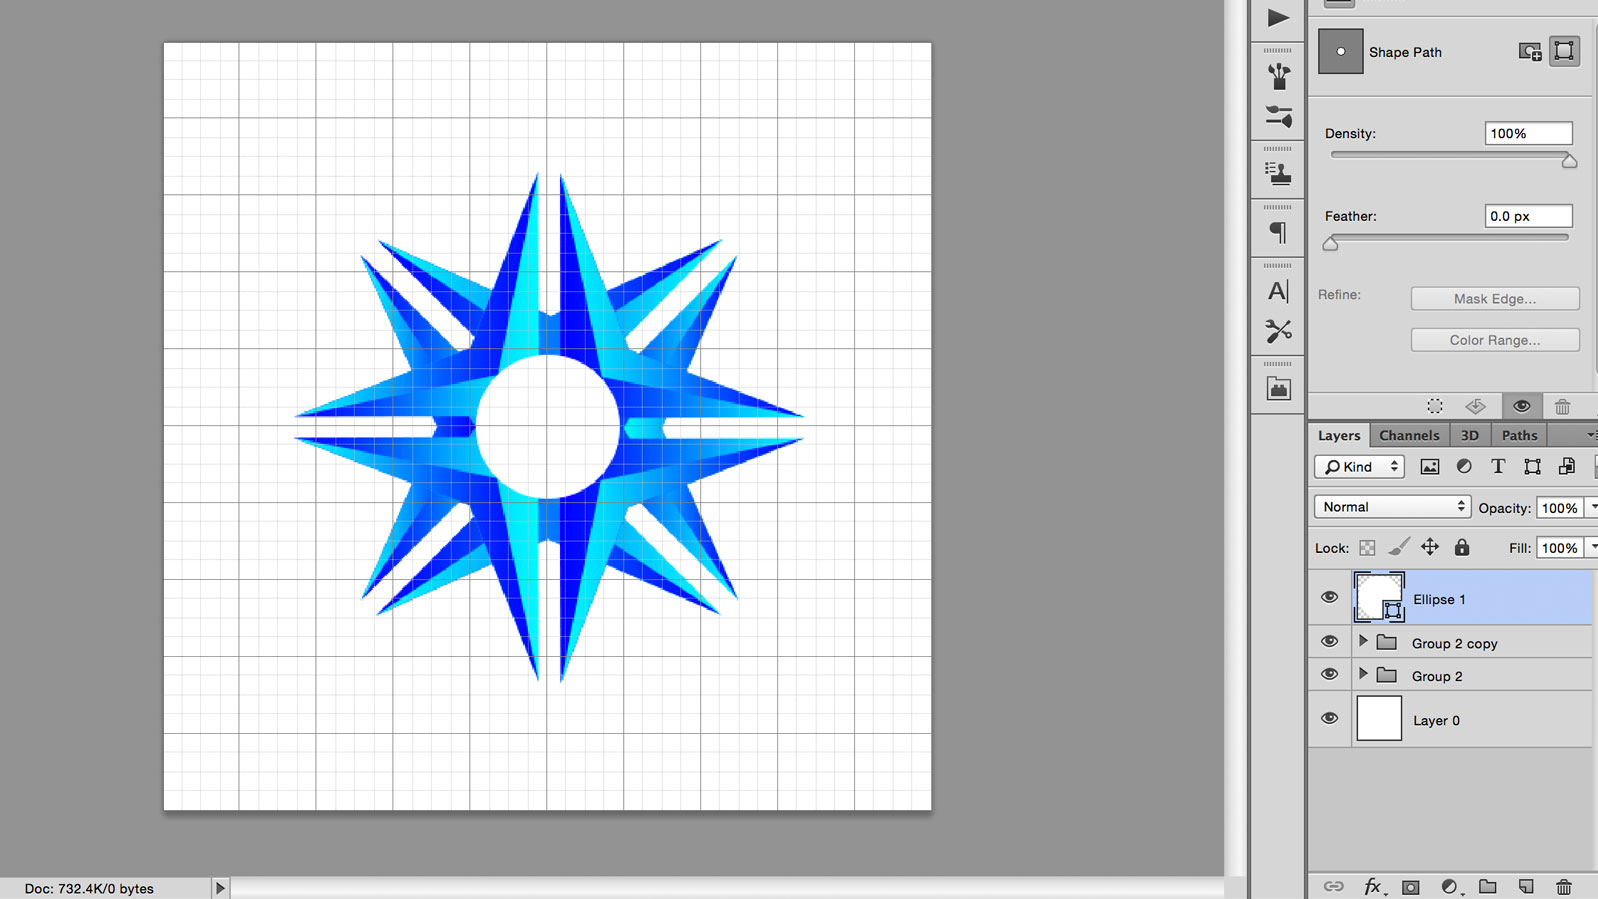
(Image: © Matt Smith)
Cycle through Shape tools until you lot find a circle, either by clicking-and-property on the icon in the toolbar or pressing Shift + U. Click on the centre bespeak of the canvas, holding Alt to draw a circumvolve radiating from the centre, and Shift to keep the width and height proportional. If yous brand a error, you can undo or re-edit your shape using Gratis Transform.
09. Draw a rectangle and align to the middle
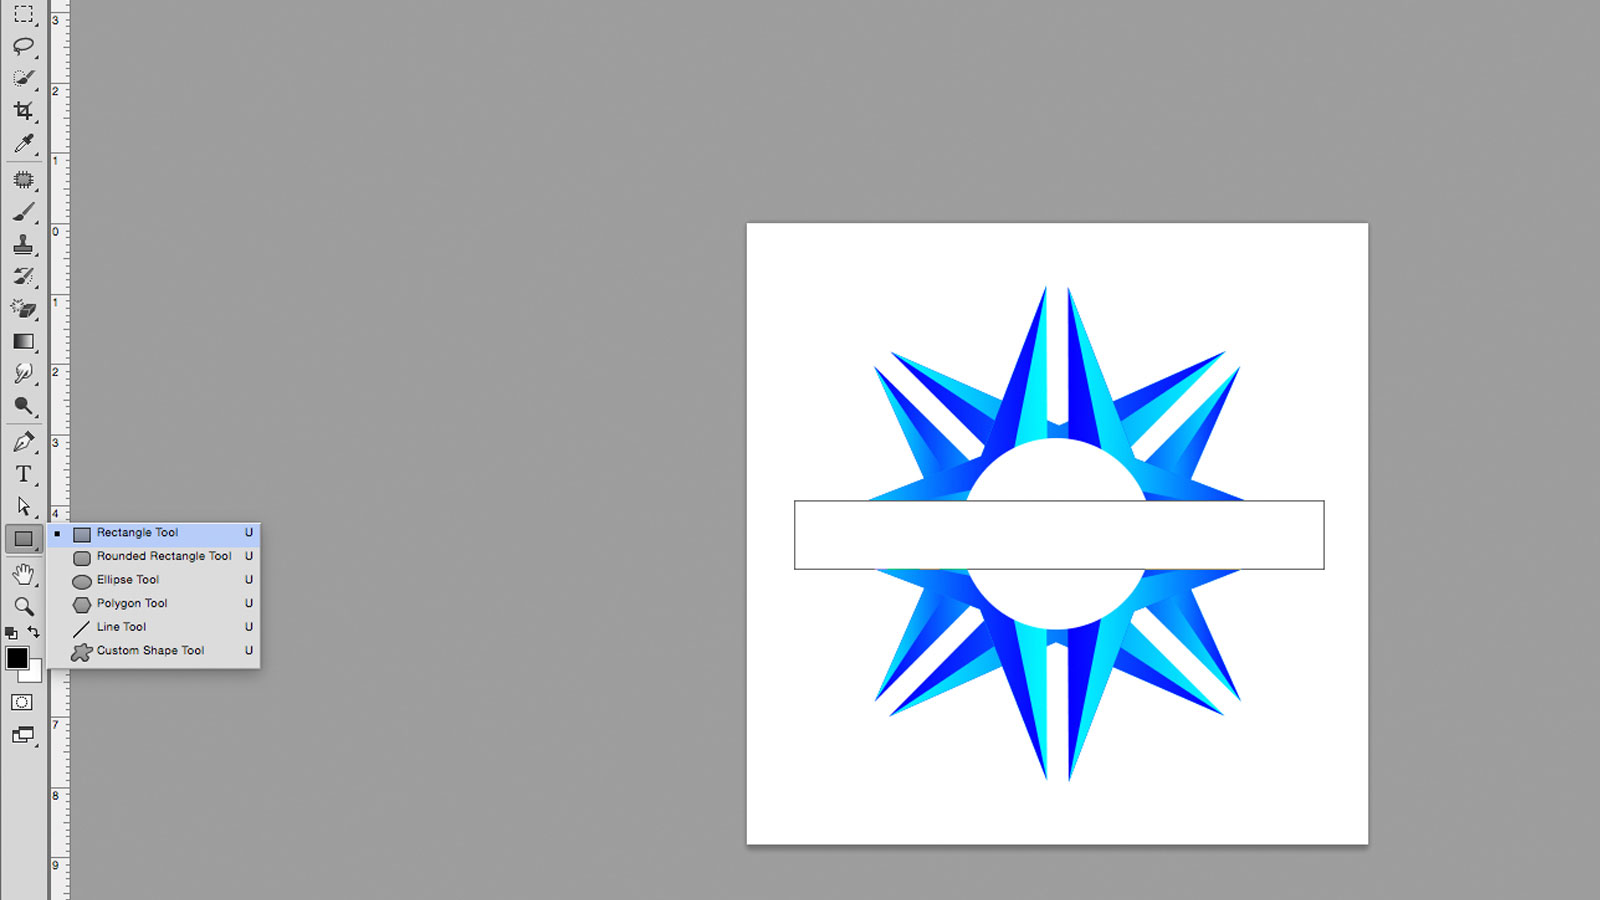
(Image: © Matt Smith)
Cycle through the shape tools once again, until you discover the rectangle tool. Draw a white box across the graphic, above the other layers, making enough infinite for text. You can marshal this to the centre of the canvas by clicking on the rectangle layer and the lesser layer (which should be a white square, the aforementioned size as the canvass) and using align tools, either found under Layers > Align in the Bill of fare Bar or the marshal buttons in the options bar.
More advanced users could use this rectangle to subtract from the shapes below, using Layer > Combine shapes, but for now we will but stick to using it as a white cake.
10. Add your text
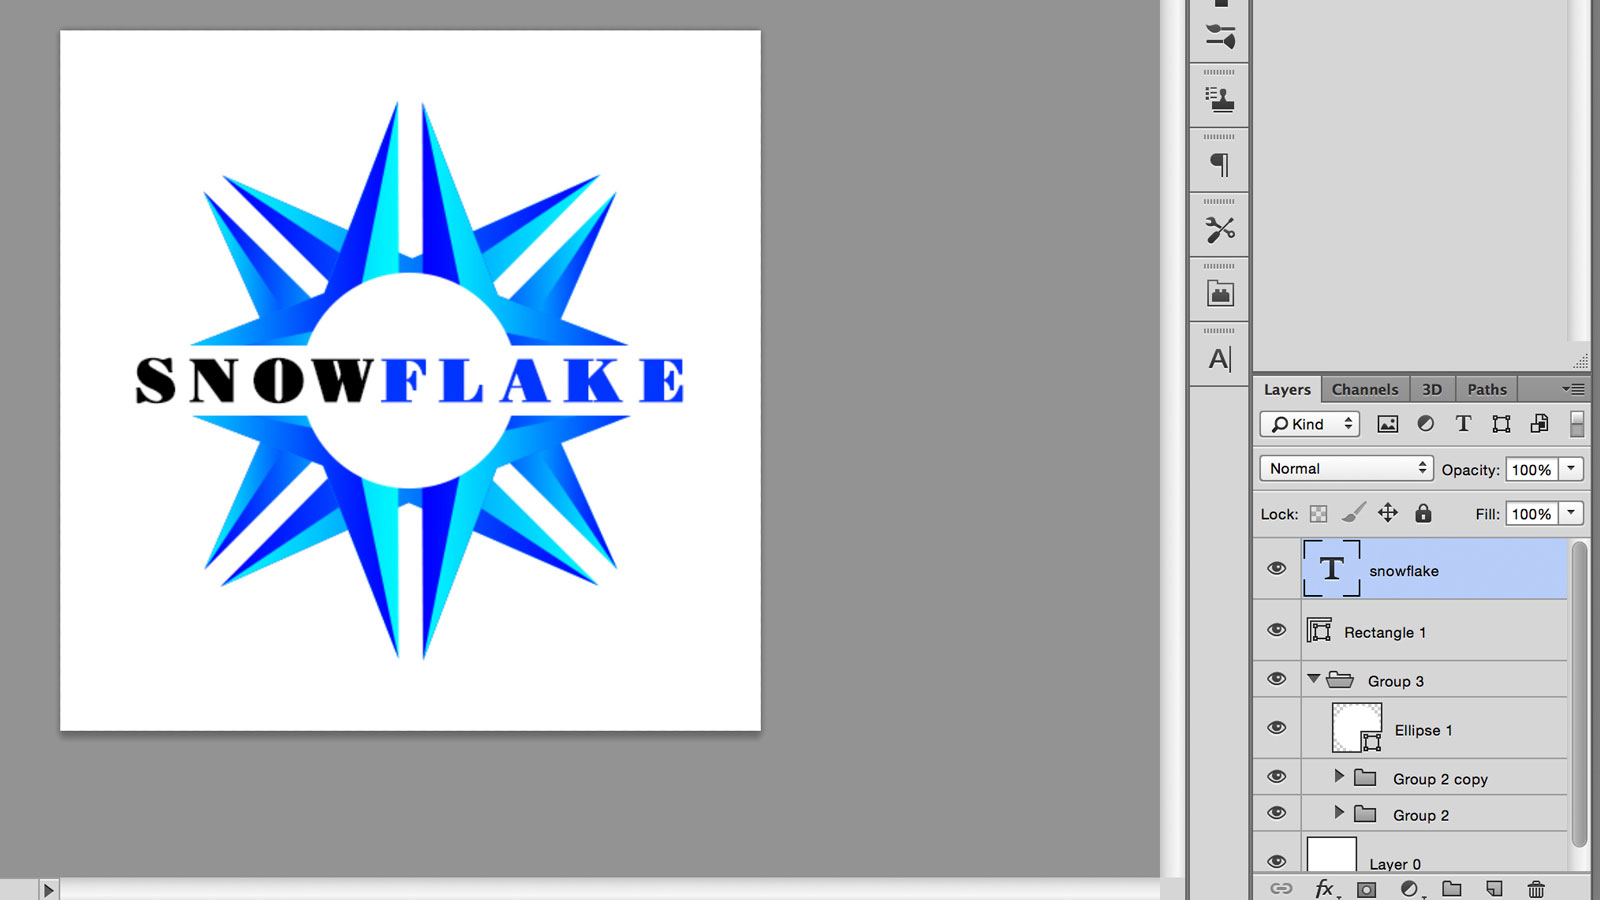
(Epitome: © Matt Smith)
Describe a text box over the rectangle, by clicking on the T icon in the toolbar or pressing T, then dragging across the canvas. Type your text into the box and centre it, using the buttons in the Character tab. Use the align tool again to centre this to the canvas.
xi. Choose an appropriate typeface
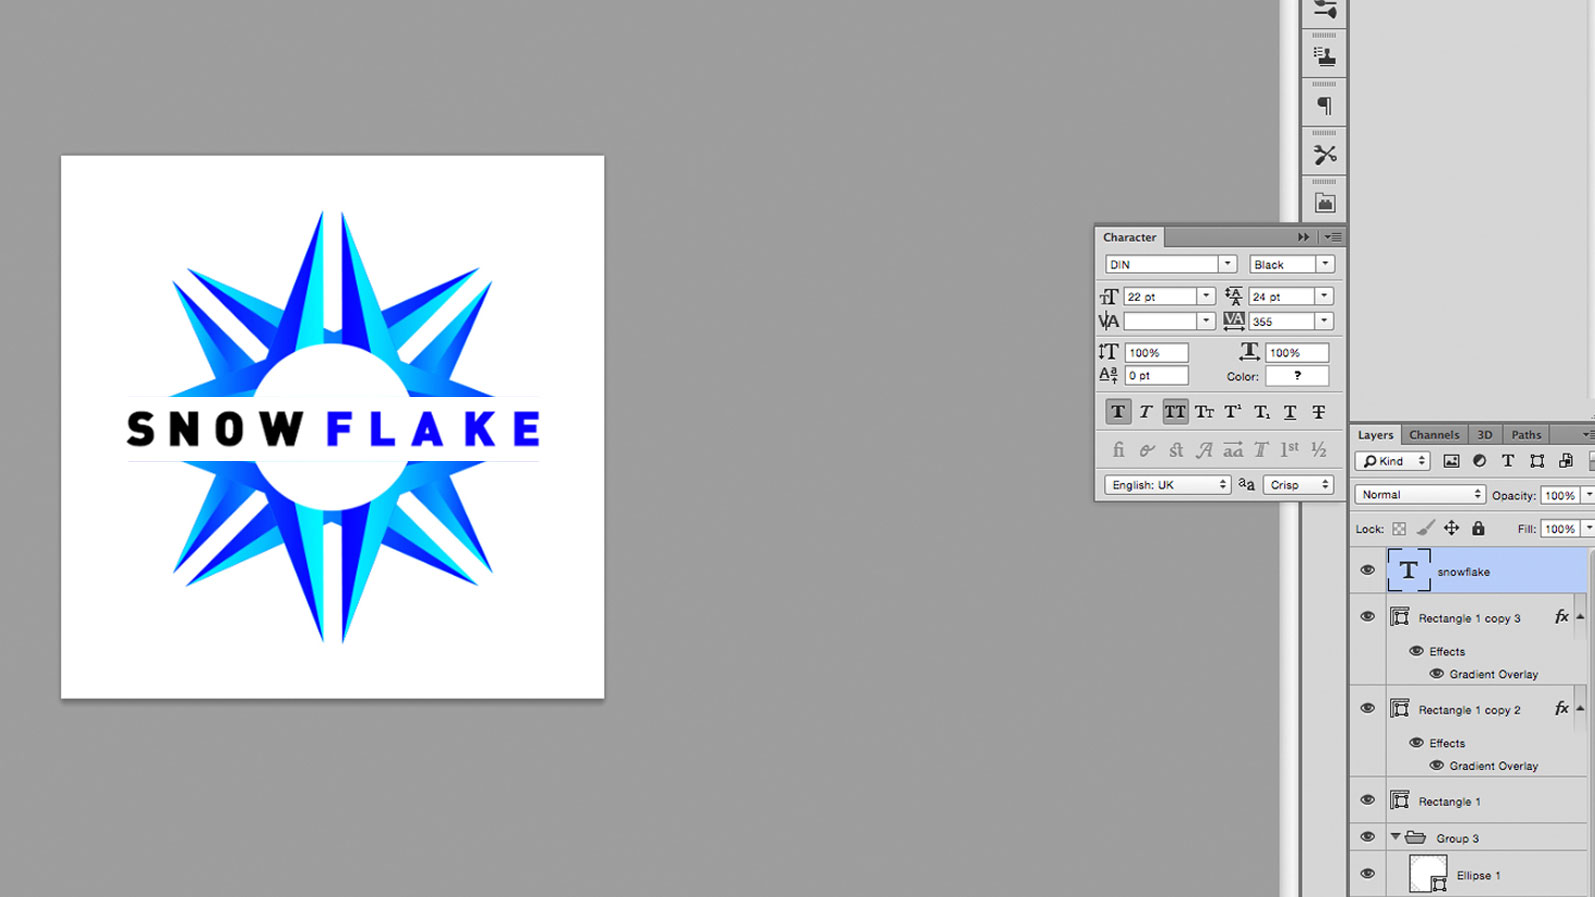
(Paradigm: © Matt Smith)
Choose a typeface that suits your brand. There are plenty of free fonts out at that place, only it is crucial to pick i that you accept permission to use – run into our costless fonts roundup for some ideas to get you lot started. Since this logo may appear across many of your assets, it would be bad news to use an illegally downloaded typeface. Play around with size and color until y'all like what you lot see.
12. Adjust your kerning
(Epitome: © Matt Smith)
Kern the text. This ways adjusting the horizontal spacing betwixt individual letters, maximising the word's readability. You tin do this nether the Type tab, marked with V | A, or by clicking between the letters and pressing alt + left or alt + correct. For more than on kerning, see our post on how to kern type.
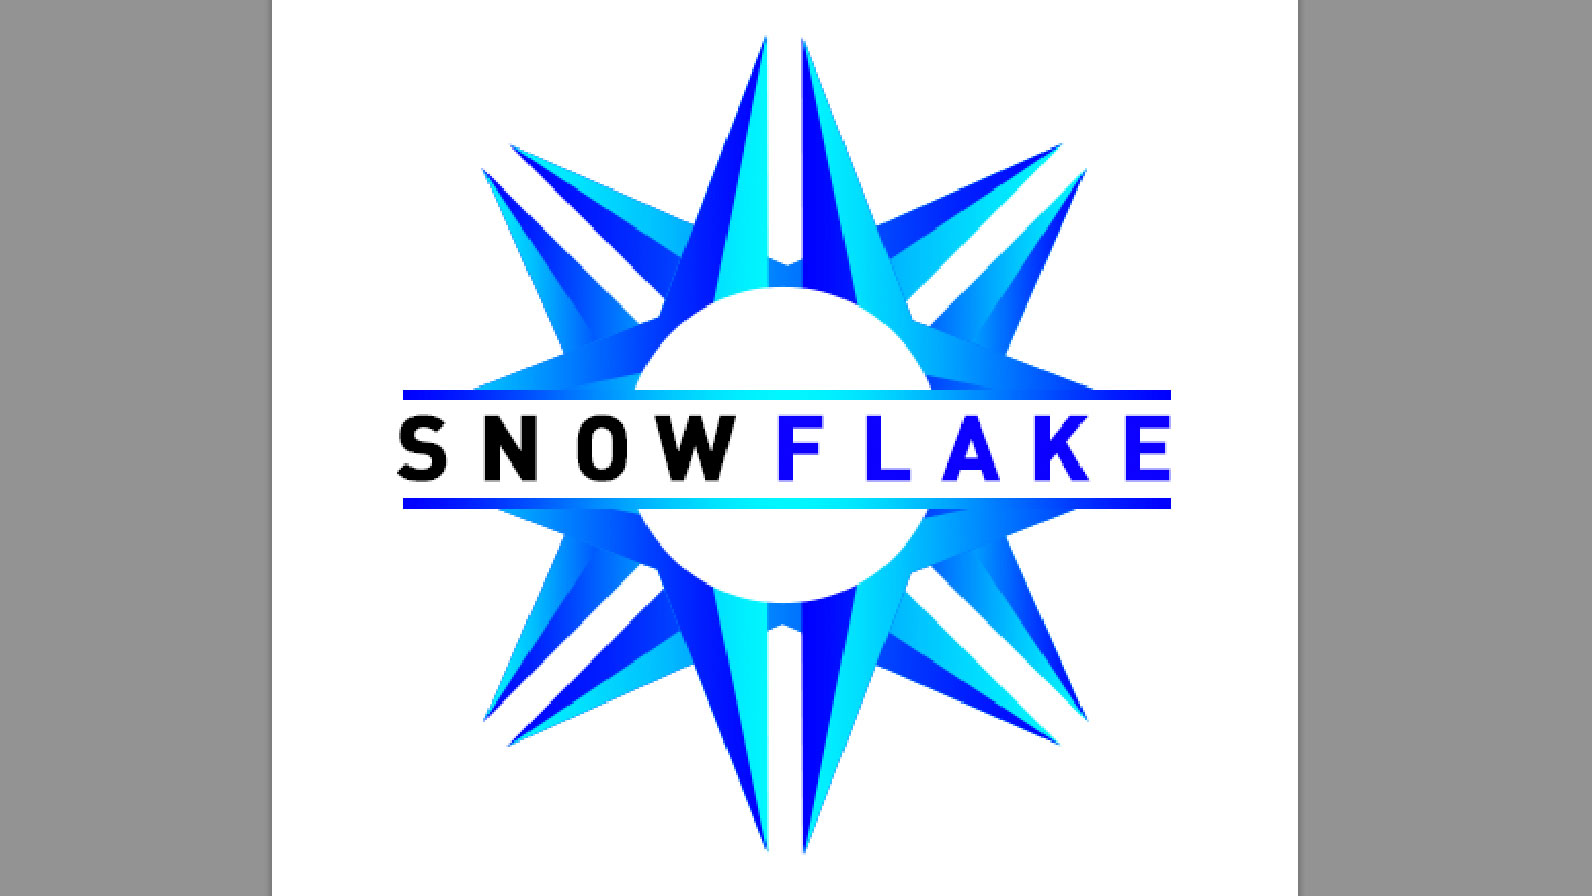
xiii. Add final details and export

(Image: © Matt Smith)
Make any last adjustments you need to give it that special something. For the main paradigm at the top of this page, I added two smaller confined to a higher place and beneath the text, coloured with the same gradient. I also added a background, shadow and reflection, using similar techniques to the other steps, also every bit using layer masks to add fade.
When you're happy, save the image out in whatever format yous crave. I used RGB jpg hither for web format, but as well saved information technology as a psd then I could become back and make changes.
Read more:
- Can you guess the brand from its original logo?
- The 9 all-time alternatives to Photoshop
- 62 Photoshop shortcuts to speed up your workflow
Related articles
Source: https://www.creativebloq.com/how-to/make-a-logo-in-photoshop
Posted by: gladneysatond1937.blogspot.com
0 Response to "What Size Document Should I Start To Make A Logo In Photoshop"
Post a Comment